5.27.2013

Featured storage: Magnetic Storage of Spellbinder and other dies

Happy Monday!
I am so happy to have one more day this weekend. I have a list a mile long of chores, errands and other around the house things to do. But alas, where am I? I am taking photos, and uploading them on my blog.  LOL! I am so addicted to crafting. That's ok, my obsession is your treasure!  Anyway, on to my project.

Again, I came up with a storage solution for my spellbinder dies and other smaller metal dies I own. I searched the Internet and saw bits and pieces of ideas I liked, but nothing I wanted to incorporate completely.

I knew I wanted to keep the front pages of the spellbinder dies. I needed the visual picture of the shapes and the names of the collections.  But I needed strong magnetic sheeting to adhere these dies to. My loving husband uses large sheets at his company, so he brought home a scrap piece for me to use. It was perfect!

Next I took the front information page from plastic packaging of my spellbinder dies. I cut a sheet of magnetic sheeting the same size. The white coating peels off, and it becomes a sticker. (how perfect is that?) I adhered it to the back of the spellbinder information sheet. I corner punched to round the edges.

front and back 

I am a very frugal crafter. I ONLY buy what I use. No more. I am not a collector, or purchase items and never use them. With that said, I only own a handful of spellbinder dies. They are simply too expensive to have a large quantity of. I love them, don't get me wrong. I only buy them on sale with a coupon.
my extensive collection thus far

 I know what the next two collections I have my eye on are: plain CIRCLES, and PLAIN ovals. (I don't care for doilies and frilly edges. I think of grandmas and old coffee tables decorated with paper doilies, lol) yucky.  :)
this system works great for all heights of dies (tall and shorter ones)
I have found a few flower and butterfly dies that I adore. Some of these third party companies are breaking away from spellbinders and creating their own lines. I own a few from Cheery Lynn. They are a bit easier to afford and just as high quality. I simply cut the label from the front of the plastic bag they were packaged in, and decorated a piece of cardboard with stampin' up! paper, and adhered the magnetic sheet to the back.
(see the purple dies in the photo)
Sits on my desk right in front of me
I store them in a cute box like a file box where they are always in view, and I flip to the one I want. No, they don't stick to each other. (I was thinking the same thing, he he). I hope this idea helps! It works perfectly for me. Enjoy. Leave a comment, it would seriously make my day!

5.25.2013

Featured File: SU! Inks Excel spreadsheet

Hey Everyone,
As I stated before, I am new to the blog world. I am testing to see if I can share a document with you through my blog. In this post, I am inserting a few ways to obtain the file, and see which method works best. Please bear with me.

What am I sharing you ask? I created a list of EVERY Stampin up color, retired to current. I couldn't locate one online that I could manipulate. (they were all .PDF's). I attempted to add which collection each color belongs. This proved to be challenging because Stampin' up changed their collection names a bit at one point. Not only that, but the collection the color fits in seems to change depending on who you ask!?! lol. Long story short, the list is most likely not 100% correct. But it is a good start.

My sheet has all the colors I own at the top, but if you alphabetize them again, they will be all the colors.  Again, if I went to all this trouble to create it, maybe it can help you! Here is a preview of the excel spreadsheet below:
1.  Try this link to see if you can obtain it: Can I upload an excel sheet?

2.  Try this one to see if you can obtain it:  http://www.mediafire.com/edit/?5haaag8apb69dkjmeln6lo43wxfdiv8

5.24.2013

Featured: Organizing blending pads!

Happy Friday everyone! Happy Memorial Day Weekend,
     I am very pleased with myself and this item I envisioned, designed and put together. It took me about three weekends to get enough time to complete it, but it was well worth it! I am excited to share it with you. Maybe you were looking for this idea as well...

     I looked all over blog-land, pinterest, websites, stores and everything in between for ideas to store blending pads. I was not impressed by anything. I knew I didn't want a three ring binder, or a container full of random colored pads. I wanted them easily accessible and labeled with the colors I currently owned, with room for more colors as my collection grew.

    A while back, Jo-ann Fabrics.com had a 5¢ shipping sale, and the blending pads were on sale too. (4.99 down to 2.99) I purchased 7 packs.  Yup...seven packs with ten pads in each...do the math...70 pads.

     I wanted to have enough for the 51 stampin up pads I have, the 12 distress pads, and a few for the other multi-colored pads that I use for blending. Not to mention room to grow...
PROJECT STEPS:
     I started my project by designing a four by four grid in Microsoft word. Then printed twelve of them on neenah cardstock and ran them through a heavy-duty laminater.


     On top of the lamination, I placed small rectangles of commercial grade Velcro that I found in the sewing department of Joann's. Using my coupon, I got three feet for less than $5. Of course, don't use the loops half, stash that away for another project.

      Then I downloaded and printed out the stampin' up labels, cut them apart and placed them alphabetically in order on four sheets. Be careful, I learned the hard way that tape is preferred over glue with the labels. The glue actually discolored the labels because it couldn't soak into the lamination. I had to peel them all off and print them out a second time and adhere them with clear scotch tape.

     I created a binder (not three ring) using a large sheet of cardboard (like science board) and decorated it with Stampin' up paper. I inserted an additional page in the middle and duck taped it in. (see photos)

     As you can see from the above photo. the bottom corner has my first blending pad on it. Each page hold 16 colors, 4 pages...do the math....64 colors! That is more than the 51 colors I currently own. I know, I know, stampin up just released their new colors. I JUST ordered the new catalog today. I can't wait to see it!
Here is an added photo of it full of pads. I placed a new pad for each color. The velcro works like a charm! 
     I have one more binder to create. I need binder to hold all my distress inks, and all the multicolored pads I own. I will be sure to add those photos too. I also re-organized my metal dies, and my acrylic stamp sets too, with minimal amounts of money invested. I will share those in my blog this weekend too. Check back soon!

****I have added details, and how-to's on this project. If you would like to make your own, click here.***

5.18.2013

Card Challenge: Seize the Birthday!

Happy Saturday!
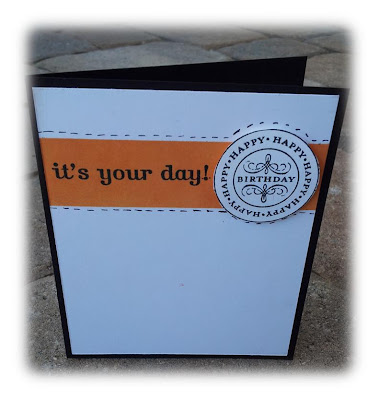
I really like how this card came out. I took my time with it, and used many techniques. I really enjoy these butterflies, I use them as much as I can. Take a look.

Please take a moment and leave a comment, or better, look around, it will make my day!

Card Challenge: CAS(E)


Happy Saturday!
I enjoyed this challenge. I got the chance to use a stampin' up! set that I haven't used since Valentines day. I took this sketch pretty literally. I used Real Red and Bermuda Bay together on glossy cardstock. Take a look.
It's been a very laid back, yet productive day. I am finishing up two card making organization projects that I am anxious to share with you as soon as they're finished. I completed the first, and hit a snag with the second. Maybe by next weekend.

5.14.2013

Card Challenge: Fusion Card!


Good evening everyone,
I had the itch to join a challenge tonight, and fusion tickled my fancy. I thought, "I can do this". 


Here are the two items, one is a sketch (left) the other is a photo (right). I took both the sketch and photo and combined them into one card. Take a look:


I'm having some difficulty with my lighting. I burnt out a bulb, and now my shadows are showing. I would love some tips on how to take perfect photos. If you have any suggestions, PLEASE drop me a comment. I would love to hear from you!

5.11.2013

Featured Stamp: Poppy Field by Rubbernecker stamps

Happy Saturday,
I was playing around with my new purchase. This flower is a set of two stamps. The first is the flowers (white       base and dots) The second stamp has the black outline.  I like the way it came out. It was refreshing to play with my white ink.  
Enjoy!

5.06.2013

Featured Stamp: Dandelion Garden Border by Rubbernecker Stamps!

Hello Eveyone,
I am very excited to show you my latest duo. It features a new company to my acrylic stamp collection. (Rubbernecker stamps) I spent a great deal of time (and $) at their booth yesterday. I fell in love with this sample card they had on display:

I loved the simplicity of the card, yet there are so many sunset type colors you can use in the background to give a slightly different effect. I thought the rhinestones in the centers of each dandelions was a great touch. I thought I even had baby butterflies at home to use.


Once I got home I played around with a new blending foam I purchased. I can't say I like the look. It's certainly more choppy than the blending foam. I attempted to scuff up the yellow card base, as it was too bright. The overall effect seems like a male card.


Duo #2 was done on really thick watercolor paper. I used my inktense pencils and a bunch of water to blend them together. I seem to gravitate towards bright, girly colors, so I purposely used dark sunset colors. The tied twine adds a nice touch.


I am very intrigued with this company. The prices were very high (I thought), but the quality is excellent, and the packaging was great. I fell in love with at least 10 stamps, but only purchased 2. I know there are SO many types of cards I can create with this stamp. I can't wait to create some more. Enjoy!

5.05.2013

Card Challenge: Seize the Birthday!

I got the chance to join another challenge. It is from" Seize the Birthday blog. It is a clean and simple card. Enjoy!

Featured Technique: Blended with Masking Card Set Expanded!

I had fun a while back creating a set of masked cards. With my new purchases at the expo, I wanted to create a few more of these cards. SO, please welcome 7 total...four more! Take a look.


All Four
I attempted to capture all seven card, but the set was bigger than my light box, so I tried three sources of light in addition to florida sunlight. Lots of shadows.  :(

5.04.2013

Scrapbook/Paper Crafting Expo in Orlando!

Hello Friends,
I just arrived back home from enjoying myself at the paper crafting expo at Gaylord Palms in Orlando, FL (about 1.5 hrs trip one way for me). The convention center/hotel was amazing! I wandered around for a bit before heading home. Here are some pictures I took:


I loved this booth. I think I need to check out this company's website!

I bought this stamp....I love it! This was a sample they had. I think I have butterflies I can use.
I bought a handful of items that I really HAD to have. I am sure you will be seeing my spoils featured here very soon. I saw other customers with bags and bags of items. They even had a BAG CHECK-IN location. (gross or what?) I thought stampers had hoarding tendencies, but now I am convinced that scrapbookers might just be ... worse. :)

It was $20 for entry and parking. Including this, I spent just less than a hundred dollars. I'm proud of myself because, I EASILY could have doubled that.  :) But alas, I think there is another convention coming in June, gotta save some money for that one. Enjoy!

5.02.2013

Featured Challenge: Poppies by Hero Arts & CAS(e) Challenge!

I had so much fun with my first challenge, I joined the next one...I think it came out very cute! Besides, I love receiving comments!  :)-


Supplies: Stamps: Poppies - Hero Arts, sentiment You Take The Cake - My Favorite Things  Paper:  , Neenah Solar White Cardstock  Inks: Paintbox pigment option pad, Tuxedo Black Tools/Punches/Dies: Sheer White Ribbon  Other: derwent Inktense pencils, gamsol, blending stump, rhinestones colored with pink marker