Showing posts with label background. Show all posts

5.18.2020

How to use your cricut to make distress masks!

Hello,
Welcome back! I am always on the look out for ways that I can use my cricut to help me make cards. I love when I think of ways to incorporate the two together to achieve a tool or task that I could not make on my own or even purchase in a store! I LOVE this hack I made!

I decided I wanted to make a series of 4 by 4-inch panels and turn them into smaller cards for my co-workers at school (when we do go back to school). But I did not have a mask that I could use to mass produce the panels, so I created one, and made my cricut do all the marking!


In my design space I create this square. The outer square was a cut line. The next biggest square was a DRAW line. I purchased a pen adapter from Etsy for SHARPIE ULTRA FINE markers. I placed a black marker in my pen holder for that line. The smallest square is a CUT line. I took a piece of white cardstock, and ran it through my laminator. This gave the sides of the mask a slick surface, and will extend the life of the mask. I did try this without using laminated paper, and I was not able to blend colors as well. (go figure?!) Below is the Item I created. 


The outer square is 5.25 by 5.75.  The DRAW line is 4 inches by 4 inches centered. The smallest opening is 3.25 by 3.25 centered. I love that design space can do that for me.


Cut out a piece of Neenah white that is 4 inches by 4 inches and line it up with the black line that the cricut drew on the mask. I use LOW tack tape that is easily removed and can be used again. Flip your mask over. Blend any ink colors you wish. I used the four colors you see in the picture.


When I was happy with the blending, I left the cardstock in the mask. I distressed it with a bunch of Tim Holtz stencils and a darker color ink. I love to splatter it with black spots too. I am getting the hang of the bristle brushes. I do not own the Tim Holtz brushes......yet.


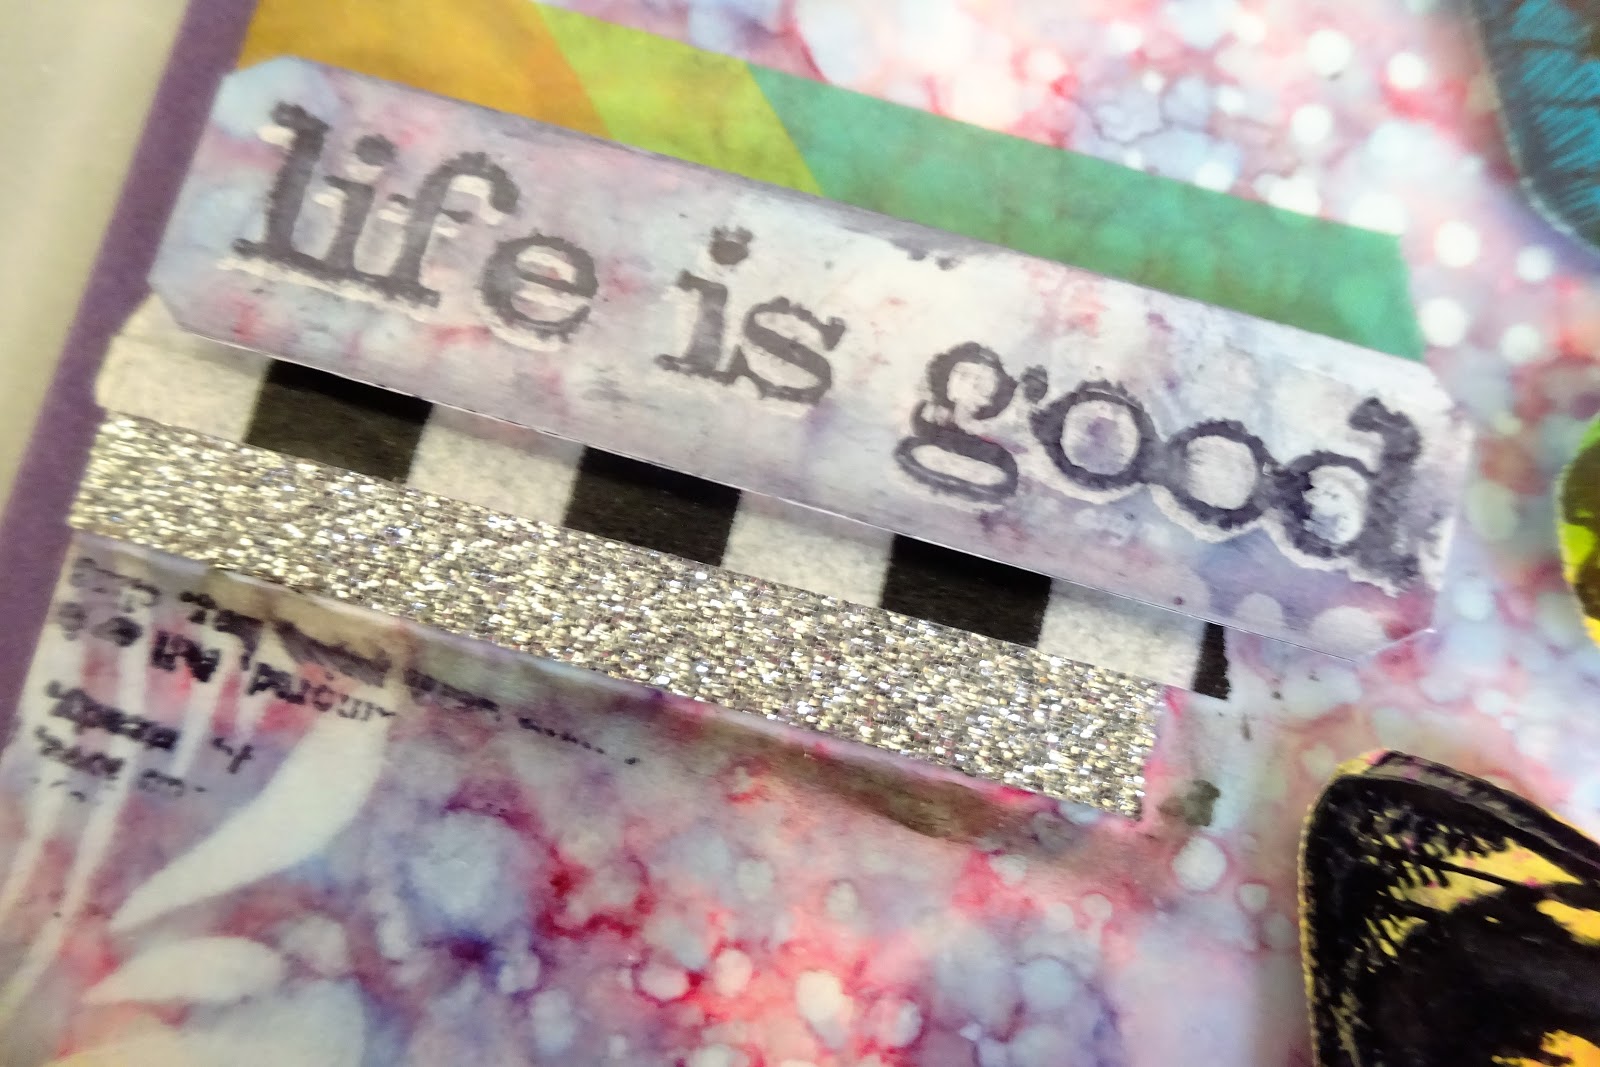
Here is an example of a finished card. I took the mask off to stamp the butterfly. I matted it on pink cardstock and I am done! This card was very quick to make, and I enjoy the distressed look.


Here are a few more blendings that I completed. I ended up cutting 10 masks, so that I could complete 10 at a time without having to remove the masks. I will finish these smaller cards in no time! Here is a link to my cricut mask. You must have your cricut design space installed to view and save my mask. LINK: Cricut masks
Kristina Werner has a whole video and post featuring many of her favorite blend combinations. I just like having fun! Thanks for dropping by. Please leave a comment, it would make my day!


4.23.2020

Tim Holtz is on a HOT streak!

Hello,
Thanks for stopping by. With the nation/world on stay at home orders, Tim Holtz has been doing MANY facebook live videos. Although I truly adore him, and I have embraced many of his techniques and I own TONS of his products, I am not glued to the computer when he is on live. I watch for a bit, and they move on. No one really notices that he does not CREATE anything in full. There is never a finished product in the end. It is almost as if he CAN'T complete a full creation ever. He leaves that up to all his creative team, I suppose. It's funny how no one really notices that....but me. He simply shows techniques that I already know, or don't interest me.
However! I do adore all his inks, stains, paints, oxides dies, stencils, stamps and hopefully (when I have more $) his glazes!
But I always go back to his wildflowers when I am stuck creatively. Take a look:


I know these look very similar to a post I had a few months back, but I saw this sentiment on someone else's card, and I HAD TO HAVE IT! I placed an order just for this set! I actually created these cards and left the space open on each card so I could finish it off with this sentiment when it arrived in the mail. Have you done that before? New to me.  Lol.
I also die cut these flowers from some alcohol inked backgrounds that I din't know what to do with! They made great flowers!
Thanks for stopping by, leave a comment. It would make my day!

4.06.2019

Crafting with a head cold!

Welcome back,
What a month! I knew that that these last two and a half months after spring break would be crazy, what I didn't expect was to get a head cold and laryngitis in the middle of it! I really am just getting my energy back, and I will be back to normal in a few days, I am sure. Meanwhile, I have two similar happy anniversary cards to post, take a look:

 The background was my main focus, I created a much larger panel with the new distress oxide sprays. I only have 3 colors so far - Mermaid Lagoon, Picked Raspberry and Fossilized Amber. I love how the colors mixed and blended on their own. I them splashed some picked fence paint to create the white dots. It looks like a night sky sort of to me.  :)

On both panels, I used the Happy die cut from Pink & Main, and and the stamp Anniversary from a older Hero Arts set. I wanted to not distract from the background. Clean, and simple. Thanks for dropping by. I would love a comment before you go!

1.27.2019

Turning the Corner...

Welcome back,

I am so glad you dropped in. I have been really intrigued with the more mixed media/grunge/steam punk look of stamping recently. I have been totally entranced with all the new releases at Creativation 2019 from Tim Holtz all the companies that he designs for. I watched all the facebook lives and drool over all the new products and designs that are coming on the market!

Although I can't own them all, I have a nice little stash of goodies that I am learning with. Take a look at today's creation!


JUST A THOUGHT:  I have been doing a lot of video watching, and blog reading about Art Journaling. The process of Art journaling never really interested me before. As I have mentioned before, I enjoy creating pieces that I can bless others with. Everything I create is turned into a card or gift of some form. I have passed by Art journaling previously because its end result is self-fulfilling. (i.e. I keep them) That makes it hard to share and it doesn't bless others.

However, I am growing as an artist, and my skills, techniques and subject matter are always changing and evolving. I am wondering if IN ADDITION to card-making (and scrapbooking) I could create a few art journal pages to play with ideas on a larger format rather than the very little card sizes.
I recently gave another look at Vicky Papaioannou art journaling style. She intrigues me. It took me a long time to assimilate her Greek accent, it was very difficult for me to understand at first. lol Her art style is very different than mine, but it is very controlled and I think I like that about it. I like the HAPPY PLANNER and hole punch that she uses for her journals. From what I can gather, she has notebooks, as well as several different sizes. (i.e.- 6 x 6 and 8 x 8) She mentioned she enjoys square journals. (huh) Just a direction I may venture into. Though I would share!

Here is another piece from the same background. Take a look:


I REALLY like these two pieces, and I am not sure I want to share them! So,  I may turn them into art for my craft room and keep them! (... I am a bit selfish after all) lol.
But before I do, I entered these into a few current challenges. Each one will take you there. I would love to know what you think!

1. Dragonfly Dreams
2. Fashionable Stamping
3. Love 2 Create
Leave a comment, I always return one!

1.25.2019

Simon Says Stamp Wednesday Challenge - Heart

Welcome back,
I am joining yet another challenge. Valentine's Day is right around the corner, so a heart challenge seems fit! Take a look:


 My background makes me SO happy. I think I really am improving my mixed media skills. (are there such things?) I wanted to incorporate this into my card for this challenge. When I pulled out my Valentines/love stash, I found a ton of die cuts I had left over from a project I made a few years back. I layered them all up to create my own thick embellishments. The challenge I faced, was that they were too "clean" (lol). I had to "dirty them up" and make them fit with the background.


I really had a fun time creating this card. I enjoyed creating my own embellishments. Thanks for stopping in. I hope my number is selected, I would love to place an order at Simon Says Stamp! Please leave a comment!

1.21.2019

Simon Says Stamp Monday Challenge - Alcohol

Welcome Back,
I am off of school today for Martin Luther King Jr. Day. I thought I would join another great challenge! I am trying my hand at a look that is a bit out of my comfort zone. I think it could grow on my though. Take a look:

I can't say that this is my original idea. I took this look from a Journal entry created by: Vicky Papaioannou Click here. I think I am warming up to her style! Her style is very controlled, and that appeals to me. :) They background is done with alcohol inks and straw. I used my stencils and the Alcohol lift ink pad with a foam pad to lift-away some of the background.  The butterflies provided my focal point. (I need to fussy cut better...huh) 


I am so glad to spend more time in my craft room today. I am getting more comfortable with my Tim Holtz products, and I keep finding more items I want (isn't it always that way?) Good thing I have a local stamp expo coming to town next month. Better start saving my pennies. Thanks for dropping by.

6.12.2018

Jennifer McGuire CASEd!

Hello and welcome back,
I am totally enjoying my summer vacation. I have been crafting, I just haven't been FINISHING projects very well. That being said, I started searching videos for inspiration. Because I love Jennifer McGuire, I dove into her older videos. (2015). I found one that was very straightforward, and totally outside of my usual designing. I didn't need a specific type of stamp set, like many of her videos feature. Here is a picture of the cards from her blog. Click HERE for the post.


The simplicity of the design and the easy supplies helped me get back on track. I was able to focus, design, start, and finish these cards in a couple of hours. It felt good to see cards all the way through! Here is my versions. Take a look:


I didn't get as clean of images as she got, but I like my cards just the same. to be honest, the artsy flowers are the ones that came out the best!  LOL I love the purple too. (of course I do) More to come! Thanks for stopping by.

2.05.2016

I adore Rubbernecker Stamps!

Do you have a company of stamps that just make you feel good? I do. I adore Rubbernecker Stamps. They are foolproof! They are designed with a watercolor feel, so even the most horrible stamped image comes out beautiful every time! I mean it!

I was dog sitting for a good friend of mine, and I brought a pile of pre-cut watercolor paper and this rubbernecker stamp set. I had more fun combining colors and stamping dozens of images to see the effect I got. They all came out beautifully. Here are a few of the images I finally got a chance to match with a background and mounted on folded card stock. Take a look:


 I took the time to re-set up my indoor light box in the corner of my craft room. I experimented with different colored backgrounds and tons of lighting. I STILL prefer my outdoor photos, but some days I am just not able to get outside due to temperature, or inclement weather. I turned up my exposure on my camera and brighten these photos up with my Microsoft Picture Manager. They still seem dark to me. What do you think? Huh.....so much to learn about this card making/paper craft obsession of mine!!  :)

Please leave a comment, it makes my day to hear from you!

1.23.2016

Old Stashed & forgotten backgrounds come to life!

With the weather being so cold, I got a chance to spend a few quiet evenings in my craft space. I took a few backgrounds that I created a LONG time ago, and finished them off with my new stamp set I recently purchased. I love it when a background you were frustrated with become a beautiful card. I also got the chance to cut more cardstock to form ready-to-go card bases and mats. It speeds up the finishing process SO much. I am actually running out of many vibrant colors of my cardstock stash!
one of a kind


This second set of Duos, I used my FOREVER favorite stamp and I...(deep breath)...I...UNMOUNTED it. This stamp is not in production anymore, and I will be so upset if something happens to it. But with it now unmounted, I was able to use it with my MISTI, and now was allowed to repeat stamp it onto water color paper and got beautiful results. It was so much fun, I had to do it again! 

This one came out wonderfully. I combined ink colors and made my own colors. I know you can't see the detail, but I used perfect pearls to give the butterflies a bit of simmer. The card is shimmery in your hands. The top butterfly was a risk, adding yellow to the busy background, and one I multi-stamped it, it fell into the background and didn't stand out as I had hoped. So I took a black marker and provided a shadow on the right edge of the wing and it brought it to the foreground right away! I know it is a busy looking card, but I love it!

I'm entering a few challenges with these beauties!

12.31.2015

New Year, New ME!

Hey strangers,
I know, I know...it's been a VERY long time. I dusted off my craft room, and got my fingers inky today. I think I found my mojo! I think I can start creating again. I am not sure if I will be consistent, but it is NEW year's eve, and I would like to make a New Year's resolution to try!

I have been so focused on my teaching, that I was simply overwhelmed by the thought of being in my craft room. I decided to force myself out of my shell, and make complicated Christmas cards (and stupidly expensive too) They came out perfectly. I was very pleased. They were inspired by Jennifer McGuire's card: here.

 Here is my take:


THEN I decided to add more names and addresses to my yearly (2016 here I come) birthday spreadsheet. When I really looked at the list, I realized that many of the names are male, and OMG! I have no manly cards at all! So, I have to get busy! When in doubt, duplicate a card you have made previously!

That is exactly what I did! I duplicated two different designs all in one day. Take a look!


I even found a bit of inspiration to create one solo card:


Sorry, the pictures are blah......I couldn't get outside to shoot the images.

3.07.2015

Spring Break 2015!


I made it to spring break! It has been a tough couple of weeks in middle school math world. We have had FSA writes testing, formal and informal observations, high school field trips, spring pictures and a lot of crazy weather!

With the crazy weather comes cold and flu season! Yup, I caught it. I usually never get what the kids bring in, but I didn't escape it this time. I have one NASTY throat cold. (NOT the flu) Just in time for Spring Break. Thank goodness, I didn't make any expensive travel plans...this cold would have ruined them. My poor husband has been sleeping on the couch to avoid my bug.

I am sipping hot apple cider tea while I type this to keep my coughing at bay. Anyway, you want to see my creation!? Good thing I can still create even when I am sick!  :)

I have been following Darlene's new membership site. (Live Love Cards) She is incredibly talented. On her new site, her latest addition is a stencil challenge. Shortly after that, she posted a bokeh technique card that I love! So I combined the two! Here is my take. I can't believe I smeared my last stamp on it. Oh well....


I created a circle stencil using three different circle punches. This is how I created the Bokeh look. Funny, I seem to steer clear of circles in my creations, but I love this look!

I am also trying to improve my picture taking. I am fortunate to live in sunny Florida, so I only take my pictures outside now, (you can see my lanai pavers in most of my recent pictures) I think it adds great texture to the photo, but I tried s white foam board this time. What do you think? Is it too plain? I have so much more to learn.

Thanks for dropping in. Please leave a comment, it would make my day!

11.06.2014

Just before my Cruise!

I totally forgot to post these cards. I enjoyed creating these. I created these before my cruise.


10.16.2014

Rainbows Make Me Smile!

Rainbows.....
The colors pop when you put them in order....they just do! I saw this photo:
I popped over to Nicole's adorable blog. I found she had made a video of EXACTLY how to create this fabulous look! Lucky for me, I had JUST purchased a set of peerless watercolor paints.

After watching her video, I gave it a try:


Thank you Nicole for the inspiration! Enjoy and thanks for stopping by!

9.20.2014

Bokeh Background Technique - By Understanding Blue

I ran across this video, and watched it from start to finish. I was looking for a way to e-mail a link to my friend, and I realized that with one click, I can post a video to my blog! How cool is that. I realize it is not my video, but I tested it out to see if it works. It does!


I have been struggling with my use or (lack of) circles in my designs. I simply don't use them. Why? Not sure. So I thought this technique may help me with incorporating circles into my cards. This video is fabulous. Thank you Blue!

12.30.2012

Featured Stamp: Happiness by Local King

Like I mentioned before, I have been going CRAZY with my card making during this holiday break. I am in love with this company also. They are actually Canadian, I believe. This beautiful background stamp is from Local King Rubber Stamp. If you go to there site, they will only show you their catalog.(bummer...but it gives to TONS of pictures of their beautiful wildlife stamps that you simply cannot find anywhere else. 

Featured Stamp: DesignBlock Birthday by Hero Arts

 With my December break in full swing, I have been going crazy making new cards. I have seen this three layer card technique everywhere. I have been pulling out my extra-large background stamps and making lots of them. 

Here are two different versions using the same stamp.This stamp is from Hero Arts. (what a great stamp line, definitely one of my favorite stamping companies) If you are looking for the dimensions to re-create this three-layer design, I used Darlene's. Her blog was my inspiration for the three layer card.

 Duo#2 is the same idea, but I split the card into three horizontal bars instead. The message was in the center, so that is why I chose that method. I think it works!I used my distress inks to create the background.  Enjoy!