I am very pleased with myself and this item I envisioned, designed and put together. It took me about three weekends to get enough time to complete it, but it was well worth it! I am excited to share it with you. Maybe you were looking for this idea as well...
I looked all over blog-land, pinterest, websites, stores and everything in between for ideas to store blending pads. I was not impressed by anything. I knew I didn't want a three ring binder, or a container full of random colored pads. I wanted them easily accessible and labeled with the colors I currently owned, with room for more colors as my collection grew.
A while back, Jo-ann Fabrics.com had a 5¢ shipping sale, and the blending pads were on sale too. (4.99 down to 2.99) I purchased 7 packs. Yup...seven packs with ten pads in each...do the math...70 pads.
I wanted to have enough for the 51 stampin up pads I have, the 12 distress pads, and a few for the other multi-colored pads that I use for blending. Not to mention room to grow...
PROJECT STEPS:
I started my project by designing a four by four grid in Microsoft word. Then printed twelve of them on neenah cardstock and ran them through a heavy-duty laminater.


On top of the lamination, I placed small rectangles of commercial grade Velcro that I found in the sewing department of Joann's. Using my coupon, I got three feet for less than $5. Of course, don't use the loops half, stash that away for another project.

Then I downloaded and printed out the stampin' up labels, cut them apart and placed them alphabetically in order on four sheets. Be careful, I learned the hard way that tape is preferred over glue with the labels. The glue actually discolored the labels because it couldn't soak into the lamination. I had to peel them all off and print them out a second time and adhere them with clear scotch tape.
I created a binder (not three ring) using a large sheet of cardboard (like science board) and decorated it with Stampin' up paper. I inserted an additional page in the middle and duck taped it in. (see photos)


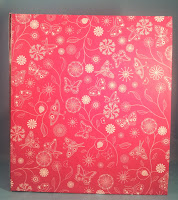


I created a binder (not three ring) using a large sheet of cardboard (like science board) and decorated it with Stampin' up paper. I inserted an additional page in the middle and duck taped it in. (see photos)


As you can see from the above photo. the bottom corner has my first blending pad on it. Each page hold 16 colors, 4 pages...do the math....64 colors! That is more than the 51 colors I currently own. I know, I know, stampin up just released their new colors. I JUST ordered the new catalog today. I can't wait to see it!

Here is an added photo of it full of pads. I placed a new pad for each color. The velcro works like a charm!

I have one more binder to create. I need binder to hold all my distress inks, and all the multicolored pads I own. I will be sure to add those photos too. I also re-organized my metal dies, and my acrylic stamp sets too, with minimal amounts of money invested. I will share those in my blog this weekend too. Check back soon!
****I have added details, and how-to's on this project. If you would like to make your own, click here.***