7.28.2018

Finishing up a few more cards

I am a busy girl! I have less than a week to do all that I need to get done before school begins! I know that my crafting time will disappear first. So I have been using my time as best as I can! Take a look:


 What a shame, you can't see the shimmer in this stamp. I think I will be buying more Hooray stamps! So cute.

Then,  I pulled out my color burst powders and used them in a new way. I SMOOSHED them with a piece of very stiff acetate. It helped me keep the color under control, and I heated them between colors. What a great look! I thought the powder would last forever. I fear I have to buy more, I finished them up! Lucky for me, there are new colors available! YAY!


A bunch more birthday Cards

Hello,
I am a busy birthday card crafter this summer! I have been so inspired! I enjoy bright colors and lots of layers! Take a look
I bought the new MFT smile die, and found an old background that I LOVED, but never found the perfect application. I love the little butterfly in the corner! You can't see the glitter.


I fell in love with this mouse image. I sent them to my cricut, printed them and cut them. Here, I glued two layers together to make him pop. I have a hard time with cute images, but this background is perfect!


 Again, using the smile die from MFT, I lifted each die cut with 3 layers of black cardstock glued together.


This is my favorite stamp from Rubbernexker stamps. It is perfect for a birthday card.

This is not my favorite card, I was experimenting with new color combos. Hey, I learned I don't like these!  LOL!

7.23.2018

More Birthday cards

Hello,
I have been stressing over the amount of male birthday cards I have (or lack there of). I got the itch to go grungy! I like Tim Holtz and his vintage, grungy, multi-media look, I just have a hard time embracing it. With the help of my cricut (those CorelDraw skills came in handy) and some great examples online, I gave it a try:


I struggle with brown. It just is not on my "favorites" palette. It's funny how much brown paper, ink and accessories I have in my stash. I had no trouble finding enough to use.


 I learned a new trick. Once I placed my wildflowers where I wanted them, I used Press-n-Seal to capture their placement. Then I could flip it over and peel off the backings and them perfectly place them back on the card base perfectly! what an awesome trick!


Once on got into the swing of things, I decided to create a few more! Thanks for dropping in. Enjoy the rest of your day.

7.22.2018

Crafty for the classroom

Hello, and welcome back!
I have been spending most of my remaining hours creating and being crafty. I am trying to balance my card making with poster making too! My husband taught me the basics of CorelDraw. I got them printed at Walmart. Take a look:


I love the way the neon color pop. I CASED the idea from a different set of posters on teachers pay teachers. They are perfect!
Just wanted to brag about my mad graphic design skills. I hope my classroom shines this fall!
Glad you came by, See you soon,

7.19.2018

New sharing kindness project!

Hello, and welcome back!
In all my wisdom, and endless time I made a project for myself. I am going to try my best to complete it. (it's a bit daunting...just a bit) Let me explain:
     I enjoy sending birthday and anniversary cards to all my friends and family. (in all, about 20 people) I know, I know, I need to get out more. So I realized that one of our office staff put all the teachers and faculty birthdays on the yearly calendar for the middle school I work at. (do you see where I am going with this?) Yup! I am going to share birthday cards with everyone who WORKS at my middle school. I can't do some co-workers, and not all.... C'mon now! (deep breath) That is close to 80 cards, I believe. So, needless to say, I am creating all sorts of birthday cards this summer to give during the year.
Here they are, I make several at a time:


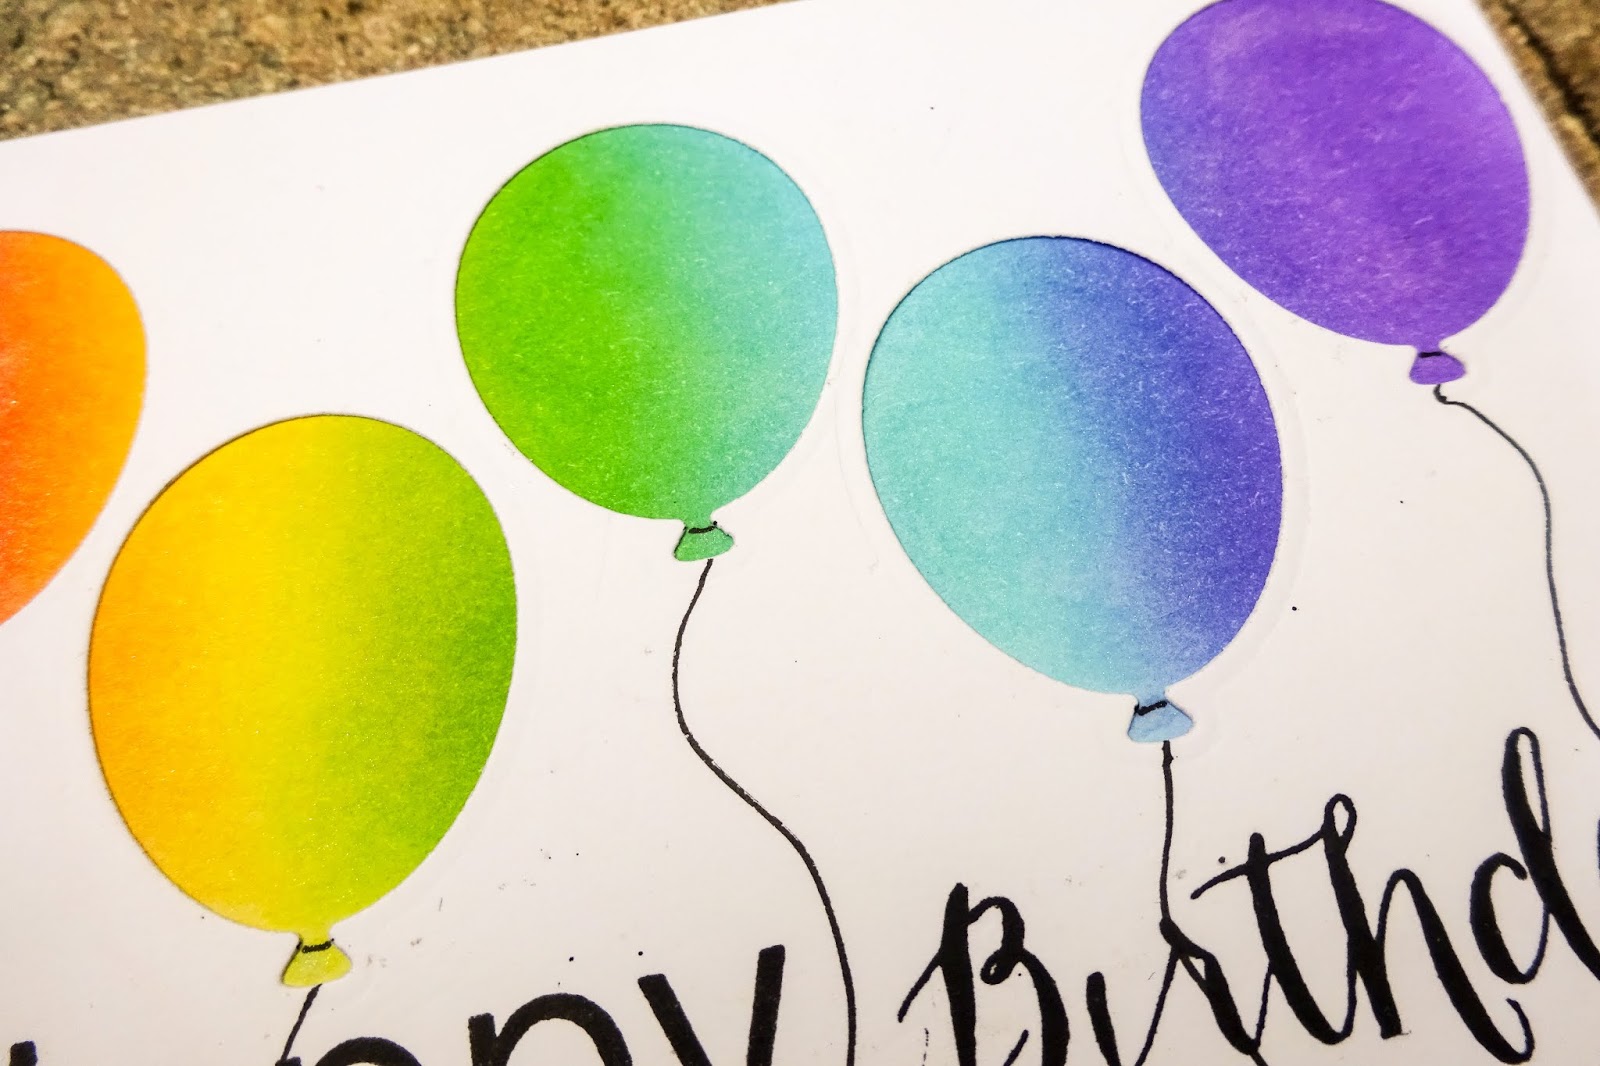
 Card 1 - Using a balloon stencil, I played around with several one layer balloon backgrounds. I used the same colors of distress inks (picked raspberry, fossilized amber, mermaid lagoon,  wilted violet and evergreen bough)


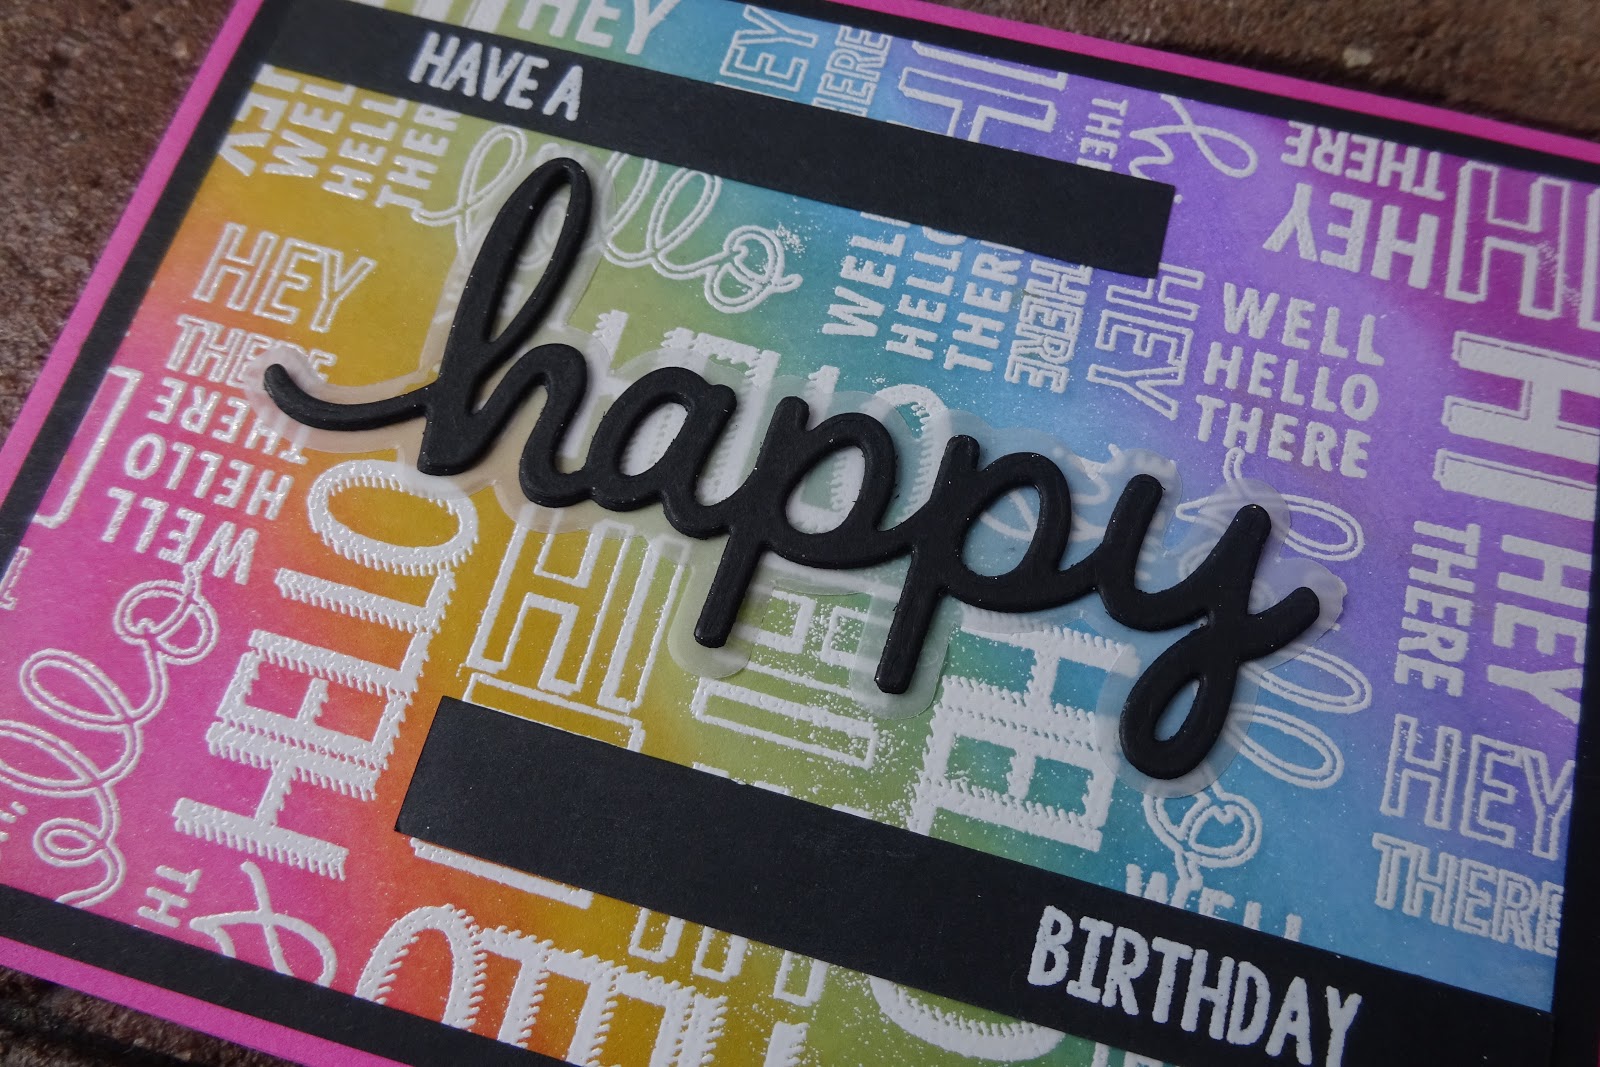
I just purchased this happy die from Pink and Main that came with the outline die as well (love it!) I cut the happy out of black cardstock and the outline with heavy vellum. I added a cute pattern strip at the bottom to finish it off.


 Card 2 - I used the same distress colors, and I flicked water on a few of them. I understand now that if you do not cover your card well enough, water BEFORE distress ink makes a dark spot! (oops) I used off white glitter paper do make it pop. Same cute patterned strip at the bottom.


 card 3 - With this one, I tried just white cardstock for the die cut. It was just too plain. I heat embossed it to give it some dimension. I think I should have layered it. Next time.


Card 4 - My favorite things sent me this cute free gift with my order! I have one single balloon die cut now! With this in mind I decided to blend distress inks on a white panel and place the die cuts on top!  I was pleased with the outcome. I am having trouble with white panels coming out of my big shot with black specks on it! It's very frustrating! I tried wiping down my cutting plates.


See the black specks? Gotta fix that!


Thanks for dropping by. Please leave a comment. It would make my whole day!

7.11.2018

Pink and Main Happy and a Turnabout stamp

Welcome back,
I have found a new passion. I love coordinating stamp and die word sets! I cannot get enough! I bought a HAPPY set from Pink and Main and I LOVE it! Take a look!


I purchased my first  "OH, HELLO TURNABOUT" stamp set from Concord and 9th. I finished one background on white cardstock and set it aside, I didn't know what do with it!?!  Then it just hit me! I love the slanted rainbow colors and the happy is SO perfect!


I think I found the perfect distress ink combination! (now, what colors did I use...) 


 I purchased the perfect layer ruler tools and I can flawlessly mat anything to 1/16 of an inch now! I love the thin look! The sentiment is an old Hero arts stamp that I peeled off its wooden base. I love vertical sentiments. These cards make me smile!


I would love a comment from you! Tell me what you think! It would make my day.
I entered this card into a birthday challenge!
Seize the Birthday - Anything Goes

7.06.2018

Happy Birthday Card

Welcome back,
With summer slipping by, I am playing in my craft room as much as I can. I vowed to post each creation as I completed them. There are so many great challenges to join right now, it is hard to choose!
Here is my creation:

I took a panel of Neenah solar white, and blended distress inks on it. Them using my MISTI, I stamped and heat embossed the white flowers for the forefront. Then I simply stamped the same flowers using the light and the dark blue color for the background. I trimmed down the panel and stamped a SU! happy birthday sentiment. Adhered the panel to a dark violet card base.

I joined a few challenges with this card:
Thanks for stopping by, leave a comment, it would make my day!

7.05.2018

We Did It! End of Summer School cards

Welcome back,
My summer is flying by! Next week is the last week of the summer school program. It was 5 weeks long. The urge hit me to create mini thank you cards to give to the staff to mark the end of the program. I had so much fun creating these cards. They are almost too cute to give away!  :)
Take a look:


Each card is 3.5 inches square. I simply like this size, there is no reason I chose this size.

 I found the "YAY!" die cut free on the Cricut Design Space this month. I sized it to fit the cards, and I sent it to my cutting machine.  I cut out 30 copies out of black cardstock, and 12 copies out of my Neenah white cardstock all the same size.


Then I dug through my stash of old backgrounds that I have created from past projects and found a handful of beautiful backgrounds that I just didn't know what to do with! I really fell in love with some of the alcohol inked backgrounds that were a bit busy with odd color combinations.


With a background in mind, I used my distress inks to attempt an ombre effect on the YAYs. Some I used one color (pink and left the rest white), others I used two or even three colors, The blending on some created additional in between colors. I covered them with versamark ink and chose a sparkly or glittery heat embossing powder and heated them with my heat gun. Several of them took two coats.

I then took 3 black layers and stacked them together with glue and left them to dry. Once dry, I glued on the heat embossed layer on top and let them dry again.


I just purchased a set of the perfect layer rulers from We are memory keepers. I LOVE THEM! I can mat anything now at a one-sixteenth of an inch! I never could do that before! The tiny black border helps bring the card together! I finished each card with a "We did it!" up with foam tape to give a bit of dimension to match the die cuts that I printed from my printer. I didn't have a stamp for that particular sentiment. I created envelopes for each one.

I entered this card into a challenge:

THE PAPER PLAYERS - CELEBRATION PP400

 I cannot wait to give them to my co-workers. Thanks for stopping by! I hope my mini cards inspired you! Enjoy your nice weather!