![]() |
| Simon Says Stamp "Heart Vent Die" |
Showing posts with label die cut. Show all posts
1.10.2016
Simon Says Heart Vent Die and Word Salad
Did you really think I would wait very long before creating something with my new purchases? Nah...
I plan to create rainbow colored hearts, but before I could dig out my scraps, I found a very cool patterned paper that I wanted to try out. Here is the result. The stamp is from Paper Smooches, Word Salad. It fits perfectly here. More to come! Enjoy!
11.27.2014
Christmas Creations on Thanksgiving!
Hello Everyone!
I have been busy enjoying my week off of teaching, and playing with all my new purchases from Simon Says Stamps! I know, it's Thanksgiving, but I have some down time until all the cooking starts. And believe me, after company leaves, I'll be creating more! Take a look at my newest creations:
Are they cute? I found this digital stamp here. Using my copic markers I made him blue, and her pink! Matted with Pink cardstock on a black card.
This is one of my newest purchases from Simon Says. It has a stamp, die set, and a stencil that match! Look here. the sentiment is from Hero Arts - CL540. I used some glitter paper and outlined the pieces with a black marker.
I pulled out a favorite background stamp from Hero Arts. I heat embossed it with gold powder. I applied three distress inks with a blender pad, and added a die cut from Wplus9. and don't forget the fiber.I pulled out a favorite background stamp from Hero Arts again with white embossing powder, and added the sentiment from Simon Says.
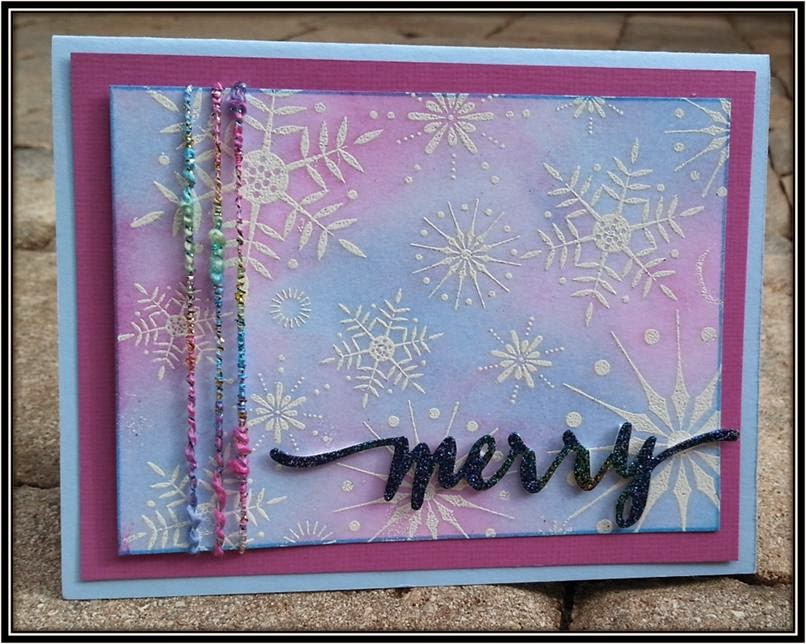
I pulled out a favorite background stamp from Hero Arts again with white embossing powder, and added the sentiment from Wplus9.
The sentiment is from Simon Says.
The sentiment from the same set: Simon Says.
I am having so much fun re-arranging my craft room, and playing with my new purchases. (Don't tell my husband) but Santa has placed two more orders for Cindy's stamping Obsession. But they will be under the tree for Christmas from the kids.
11.19.2014
Organization of Dies Using my Cricut!
Hello!
I can't express how satisfying it is to envision an organizational idea in my head, and have it come to reality just as I thought it would! I created this WHOLE project myself. (I can be rather stubborn) when I get stuck on something. Here is the problem:
Problem: Need to set up a current organizational system to store my dies that is NOT expensive. and easy to update in the future. NO 3-ring binders or pages. I want something I can flip through and store upright. It must be expandable to incorporate all my future purchases. I HATE labeling things with those stupid white strips. (everyone uses them - thanks Jennifer McGuire!) I refuse. I want images and pictures.
Solution: Using my cricut, and some magnetic sheeting that my loving husband uses at work, I DON'T have to follow every other card maker's system I see on the internet, and I can have a system that I can call my own. (and share with you).
Tutorial:
I ran across this pad of paper on the sale rack at Walmart. the sale sticker read: "$5.00" by when the check out girl rang it up it read: "$2.50". (what a deal!). This paper is very pretty and seems thicker than other paper I have.
On the internet I found the SVG of a envelope I liked. It was 3.75" by 4.75", This was just big enough for all my dies. Here is a screen shot:
I put two to a sheet. The dashed lines are perforations that will make the folding easier.Here are two yellow envelopes after the cricut cut them out. I love how the paper gets darker from top to bottom.
I folded the envelope and used strong adhesive to seal the edges. The magnetic sheet is on the right cut 3.5" by 4.5".
I placed my "hello" dies (large and small) together for one envelope. and slid it into the envelope.
This is the original packaging that the large die came in. (I cut and taped the small die info on it). I cut the front of the package to fit on the front of my new envelope.
Here is the finished product. (only four pictured) I just have to find a container to hold them all now. (or maybe I will create one... lol) I have cut out 30 envelopes thus far all different colors. My collection is small, but I am sure it will grow. I hope I gave you ideas to make your system your own. I will be happy to share the SVG file with you or anything else you want to know, if you leave me a comment.
Now, I can move on to a new clear stamp system and a system to organize and store my paper scraps too. Stay tuned for more to come!

9.15.2014
Featured Stamp Set: Petals from Scratch - Fiskars
Hello!
I was playing around in my craft room, and a simple card emerged. (Don't you love when that happens!?) I am sure I was inspired by a post I saw, although i can't give credit off-hand. It looks so spring-y, (although we are currently heading into autumn here in Florida) I wanted to share with you!
I spend the other day researching PEERLESS water colors. They seem to be all the rage in card-making right now. I put it off and put it off, and decided that I can watercolor just fine using distress inks and all the other inks I own. I just can't afford to purchase every HOT item in this industry. (although some days I feel like I DAMN right deserve it) Maybe once the rage settles down, I will find a small "try me out set". Until then, I will hone my water coloring skills with other paints!
Supplies:
Flower stamp: Fiskers "Petals from scratch"
Butterfly stamp: Penny Black "free flight"
Sentiment: Penny Black "Allegro"
Ink: distress Inks and Embossing powder
I was playing around in my craft room, and a simple card emerged. (Don't you love when that happens!?) I am sure I was inspired by a post I saw, although i can't give credit off-hand. It looks so spring-y, (although we are currently heading into autumn here in Florida) I wanted to share with you!
I spend the other day researching PEERLESS water colors. They seem to be all the rage in card-making right now. I put it off and put it off, and decided that I can watercolor just fine using distress inks and all the other inks I own. I just can't afford to purchase every HOT item in this industry. (although some days I feel like I DAMN right deserve it) Maybe once the rage settles down, I will find a small "try me out set". Until then, I will hone my water coloring skills with other paints!
Flower stamp: Fiskers "Petals from scratch"
Butterfly stamp: Penny Black "free flight"
Sentiment: Penny Black "Allegro"
Ink: distress Inks and Embossing powder
9.14.2014
Clean & Simple Stamping Card Challenge:307
I joined the card challenge at Clean & Simple Stamping this week. This card has a bunch of techniques built into it. (Watercoloring, die cutting and embossing, and painting with distress inks) Not to forget the fiber and the framelit! Take a look. Here is the sketch I drew the idea from:
Take a look around while your here. I would love a comment or two. It would make my day!
9.13.2014
Hello! Simon Says Die cuts
Good afternoon!
I have had a busy week with teaching, and did not get a chance to post my cards! I LOVE the way they came out.

This paper came from SSS in a card set. The paper gets darker at the bottom and had a sun at the top. If you look closely you can see the sun rays peeking at the top! I hated having to cut it down for the card, but I love the effect! I wanted more lift, so I popped it up with 6 layers beneath for more drama.
I have had a busy week with teaching, and did not get a chance to post my cards! I LOVE the way they came out.

I purchased the hello die from Simon Says stamps after seeing everyone making fabulous creations with it. I pulled out patterned papers that I received in my monthly kits from SSS. I know the balls in this paper simply look like circles, but if you look closely, they are lanterns attached on strings. i Popped the "hello" with three layers beneath it to give it dimension. I love this look.
This paper came from SSS in a card set. The paper gets darker at the bottom and had a sun at the top. If you look closely you can see the sun rays peeking at the top! I hated having to cut it down for the card, but I love the effect! I wanted more lift, so I popped it up with 6 layers beneath for more drama.
9.07.2014
Featured Product: Simon Says Stamps' die: Hello!
Hey there,
I had time to play around with the "hello" die I purchased from Simon Says Stamps. That site is very addicting! It has everything and more. I love just playing around and seeing what emerges from my craft room. Here's some of my creations before I made cards with them.
I clear embossed it twice, then embossed a third time with JudiKins "Psychedelic" embossing powder! WOW! Can you see the colors! Beautiful!
I had time to play around with the "hello" die I purchased from Simon Says Stamps. That site is very addicting! It has everything and more. I love just playing around and seeing what emerges from my craft room. Here's some of my creations before I made cards with them.
I clear embossed it twice, then embossed a third time with JudiKins "Psychedelic" embossing powder! WOW! Can you see the colors! Beautiful!
I was so in love with the colors I embossed other sentiments I had leftover from past cards. I must use this embossing powder more often!
I created a full sheet of these butterflies and then cut them up and made front panels with them.
Then I die cut the Hello, and inserted the beautiful Hello from above! WOW, just as I envisioned. I love it!I think I will be making a few more of these! Stay posted!
Subscribe to:
Posts (Atom)